Disclaimer: This content is for educational purposes only, not medical advice. Always consult with a doctor before making significant changes to your diet, especially if you have pre-existing health conditions.
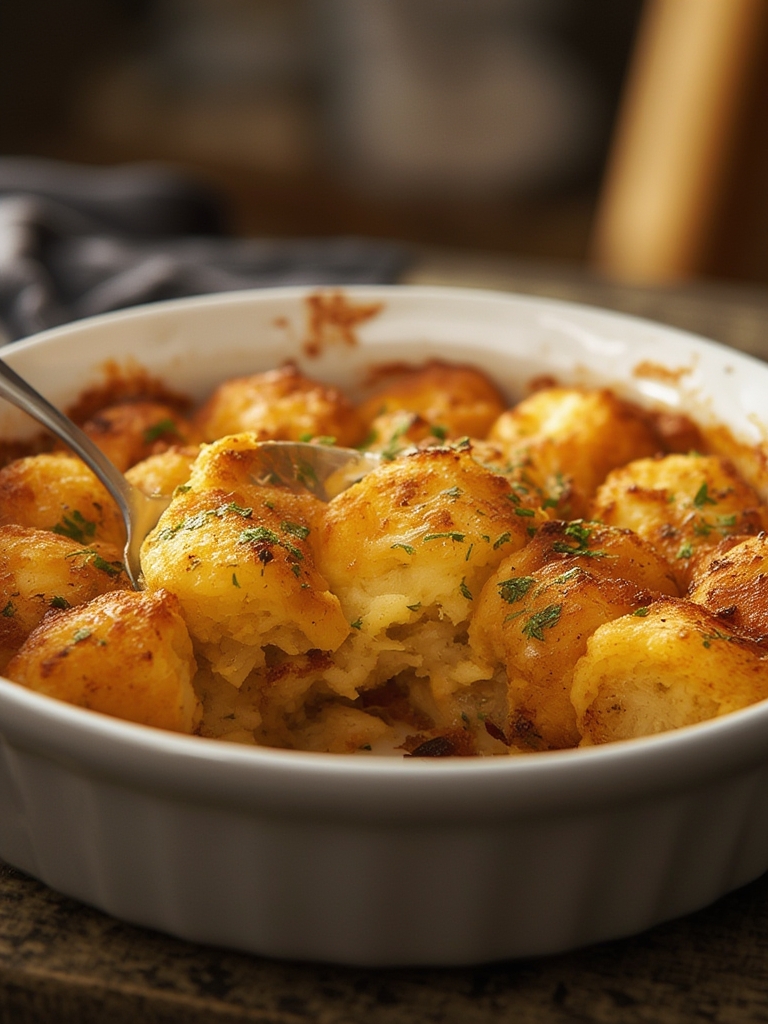
Tater tot casserole brings back some of my fondest childhood memories in Asheville. Growing up in those North Carolina mountains, this dish was my mom’s go-to for busy weeknights when we needed something hearty and satisfying. The crispy potato topping and savory filling created a perfect comfort food that I’ve now adapted and perfected in my own kitchen. Today, I’m sharing my favorite version that balances simplicity with incredible flavor – perfect for beginners and experienced cooks alike.
Table of Contents
Key Takeaways: What You Need To Know
– Tater tot casserole requires just 7 basic ingredients but can be customized with add-ins
– Prep time is only 15 minutes with a total cooking time of 45 minutes
– The dish freezes beautifully for up to 3 months
– You can prepare components ahead of time for busy weeknights
– This recipe serves 6-8 people, making it perfect for family meals
What Makes This Tater Tot Casserole Special?
This tater tot casserole combines simplicity with home-cooked comfort in every bite. The contrast between the crispy tater tot topping and the creamy, flavorful filling creates a texture and taste experience that appeals to everyone from picky eaters to culinary enthusiasts. What sets this version apart is the balance of convenience and fresh, quality ingredients.
Why Is Tater Tot Casserole So Popular?
Tater tot casserole has remained a beloved family meal across America for decades because it embodies what home cooking is all about. The dish gained popularity in the Midwest during the 1950s when convenience foods were becoming mainstream. Its combination of affordability, simplicity, and adaptability makes it perfect for busy families looking for satisfying meals.
The popularity of tater tot casserole continues today because it hits all the comfort food requirements – it’s warm, filling, and evokes nostalgic feelings. My Asheville upbringing taught me that food isn’t just sustenance; it’s a way to bring people together, and this dish certainly does that job well.
How Has This Recipe Evolved?
My tater tot casserole recipe has evolved significantly from the basic version my mom used to make. While maintaining its comfort food status, I’ve incorporated fresher ingredients and flavor-boosting techniques that elevate the entire dish.
The original tater tot casserole relied heavily on canned soups and minimal seasonings. My updated version balances convenience with fresh components like sautéed onions, garlic, and a blend of herbs. I’ve also found that using a combination of cheeses rather than just one type creates a more complex flavor profile that makes everyone ask for seconds.
Ingredients You’ll Need for Perfect Tater Tot Casserole
Creating a delicious tater tot casserole starts with gathering the right ingredients. The beauty of this dish lies in its simplicity – most components are likely already in your pantry or freezer. My recipe focuses on accessible ingredients that create maximum flavor with minimum fuss.
What Are the Essential Components?
The foundation of any great tater tot casserole includes a few must-have ingredients that provide the classic flavor and texture. Each component plays a specific role in creating that perfect comfort food experience.
– 1 pound ground beef (80/20 lean-to-fat ratio works best)
– 1 medium yellow onion, finely diced
– 2 cloves garlic, minced
– 1 can (10.5 oz) cream of mushroom soup
– 1/2 cup sour cream
– 2 cups shredded cheddar cheese, divided
– 1 package (32 oz) frozen tater tots
– Salt and pepper to taste
The ground beef provides protein and hearty flavor, while the cream of mushroom soup and sour cream create that signature creamy texture. The tater tots form the crispy crown that makes this dish instantly recognizable, and cheese brings everything together with its melty goodness.
What Variations and Add-ins Work Well?
One reason I love making tater tot casserole is its versatility. While the classic recipe is delicious, adding your personal touch makes it even better. Over years of experimentation in my Asheville and now home kitchen, I’ve discovered several fantastic variations.
| Add-in Option | Suggested Amount |
|---|---|
| Mixed vegetables (frozen) | 1 cup |
| Bacon (cooked and crumbled) | 4-6 slices |
| Green chilies (diced) | 1 small can (4 oz) |
| Italian seasoning blend | 1 tablespoon |
For a breakfast twist, try substituting breakfast sausage for the ground beef and adding scrambled eggs to the mixture. This creates a delicious brunch casserole that’s perfect for weekend gatherings.
Step-by-Step Tater Tot Casserole Instructions
Tater Tot Casserole
Equipment
- 9×13-inch baking dish
- Large Skillet
- mixing bowl
- Spatula
- Measuring cups and spoons
Ingredients
- 1 lb ground beef
- 1 medium yellow onion, diced
- 2 cloves garlic, minced
- 1 can cream of mushroom soup (10.5 oz)
- 1/2 cup sour cream
- 2 cups shredded cheddar cheese, divided
- 32 oz frozen tater tots
- salt and pepper to taste
Instructions
- Preheat oven to 375°F (190°C) and grease a 9×13-inch baking dish.
- Brown ground beef in a skillet over medium-high heat, breaking it apart as it cooks.
- Add diced onion and cook until softened, then stir in garlic and cook briefly.
- Drain excess fat and remove from heat. Stir in cream of mushroom soup and sour cream until combined.
- Fold in 1 cup shredded cheese and season with salt and pepper.
- Spread mixture evenly into prepared baking dish.
- Arrange frozen tater tots in an even layer on top.
- Sprinkle remaining cheese over the top.
- Bake covered for 25 minutes, then uncover and bake 15–20 minutes until golden and crispy.
- Let rest 5 minutes before serving.
Notes
Nutrition
Creating the perfect tater tot casserole involves a few simple steps that anyone can master. The process combines quick stovetop preparation with hands-off oven baking, making it ideal for both beginner cooks and busy weeknights.
How Do You Prepare the Filling?
The filling is the flavorful base that anchors your tater tot casserole. Preparing it properly ensures your casserole has the right texture and depth of flavor that makes this comfort food so satisfying.
1. Preheat your oven to 375°F (190°C) and lightly grease a 9×13-inch baking dish.
2. Brown the ground beef in a large skillet over medium-high heat, breaking it into small pieces as it cooks.
3. Add the diced onion when the beef is about halfway cooked and continue cooking until the onions are translucent.
4. Stir in the minced garlic and cook for an additional 30 seconds until fragrant.
5. Drain excess fat if necessary (I usually keep a little for flavor).
6. Remove from heat and stir in the cream of mushroom soup and sour cream until well combined.
7. Fold in 1 cup of shredded cheese until melted and incorporated.
8. Season with salt and pepper to taste – be generous with the black pepper for the best flavor.
The filling should have a creamy consistency that’s not too thick or runny. If it seems too thick, you can add a splash of milk to adjust the texture.
How Do You Assemble and Bake the Casserole?
Assembling and baking your tater tot casserole properly ensures you get that perfect contrast between the creamy interior and crispy topping. This final stage is where the magic happens.
1. Transfer the filling mixture to your prepared baking dish, spreading it evenly.
2. Arrange the frozen tater tots in neat rows covering the entire surface. (This is where I deviate from my mom’s method – she just scattered them, but I find the rows create more consistent crispiness).
3. Sprinkle the remaining cup of cheese evenly over the tater tots.
4. Cover with aluminum foil and bake for 25 minutes.
5. Remove the foil and continue baking for another 15-20 minutes until the tater tots are golden brown and crispy.
6. Let stand for 5 minutes before serving to allow the casserole to set.
For extra browning on the tater tots, you can switch the oven to broil for the last 2-3 minutes of cooking time, but watch carefully to prevent burning. The casserole should be bubbling around the edges and golden on top when it’s ready.
How to Serve and Store Your Tater Tot Casserole
Once your tater tot casserole is perfectly baked, proper serving and storage will ensure you enjoy every last bite. This family-friendly dish pairs well with simple sides and can be prepared in advance for busy weeknights.
What Side Dishes Complement Tater Tot Casserole?
Tater tot casserole is a hearty main dish that pairs beautifully with lighter, fresher sides to create a balanced meal. Growing up in Asheville, we always had a colorful vegetable alongside this comfort food classic.
– Simple green salad with vinaigrette dressing
– Steamed broccoli or green beans
– Sliced fresh tomatoes with a sprinkle of salt
– Corn on the cob during summer months
– Pickled vegetables for a tangy contrast
For a complete meal that satisfies everyone at the table, I recommend serving tater tot casserole with a crisp salad dressed with a vinaigrette. The acidity and freshness of the salad balance the richness of the casserole perfectly. This was always my dad’s favorite combination, and I’ve continued the tradition in my own home.
How Should You Store and Reheat Leftovers?
One of the best aspects of tater tot casserole is how well it works as leftovers. In fact, some people (including my husband) believe it tastes even better the next day when the flavors have had time to meld.
For proper storage:
– Refrigerate cooled leftovers within two hours of cooking
– Store in airtight containers for up to 3-4 days
– Freeze portions for up to 3 months in freezer-safe containers
For reheating:
1. Microwave method: Heat individual portions for 2-3 minutes, stirring halfway through
2. Oven method: Cover with foil and heat at 350°F for 20-25 minutes until hot throughout
3. Toaster oven method: Perfect for smaller portions, heat at 350°F for 15-20 minutes
To revive the crispiness of the tater tots when reheating, remove any covering for the final few minutes of reheating time. This allows the top layer to crisp up again rather than remaining soggy.
Time-Saving Tips for Making Tater Tot Casserole
As a busy home cook, I’m always looking for ways to make meal preparation more efficient without sacrificing flavor. Tater tot casserole is already relatively quick to make, but these time-saving strategies can help you get this comfort food classic on the table even faster.
How Can You Prep Components in Advance?
Preparing elements of your tater tot casserole ahead of time can dramatically reduce the effort needed on busy weeknights. This strategy has saved me countless times when juggling work and family responsibilities.
The filling can be completely prepared up to 2 days in advance:
1. Cook the ground beef with onions and garlic as directed
2. Mix in the cream of mushroom soup and sour cream
3. Store in an airtight container in the refrigerator
4. When ready to bake, just warm the mixture slightly, transfer to your baking dish, and continue with the recipe
You can also pre-measure and prep other components:
– Shred cheese ahead of time and store in ziplock bags
– Chop any add-in vegetables and refrigerate
– Mix dry seasonings together and store in a small container
“I’ve been making Lucy’s tater tot casserole recipe for months now, and her tip about preparing the filling ahead of time has been a game-changer for our family dinners,” shares Maria from Colorado. “I make double batches of the filling on Sunday afternoons and use it throughout the week. My kids request this dish constantly!”
What Kitchen Tools Make Preparation Easier?
Having the right tools can significantly streamline the tater tot casserole-making process. Based on my years of cooking experience, these are the items that make the biggest difference:
– Large cast iron skillet – Perfect for browning meat and can go directly into the oven, reducing dishes
– Quality cheese grater – Freshly grated cheese melts better than pre-shredded
– Silicone spatula – Ideal for folding ingredients together without scratching pans
– Meal prep containers – Essential if you’re making components ahead of time
– 9×13 baking dish with lid – Makes storage simple if you have leftovers
My grandmother always said the right tools make cooking a joy rather than a chore, and I’ve found this to be especially true when preparing family favorites like tater tot casserole. Investing in a few quality kitchen items has made my daily cooking routine much more pleasant and efficient.
Remember, cooking should be enjoyable, not stressful. These time-saving techniques allow you to put a homemade meal on the table without spending hours in the kitchen – something I believe is essential for maintaining the joy of cooking in our busy lives.
By incorporating these tips into your routine, you’ll find that making tater tot casserole can become an easy weeknight option rather than a complicated project. As we say in my Asheville-inspired kitchen: simplicity first, creativity always!