Disclaimer: This content is for educational purposes only, not medical advice. Always consult with a doctor before making significant changes to your diet, especially if you have pre-existing health conditions.

gluten free sourdough starter became one of my favorite kitchen projects after a chilly Asheville morning reminded me how much comfort lives in a simple jar of flour and water. I’m Lucy, the home cook behind urdailyrecipes, and I grew up in Asheville, North Carolina, where mountain mornings, family tables, and creative cooking shaped the way I cook today.
When I first tested a gluten free sourdough starter in my own kitchen, I wanted it to feel approachable. No fancy equipment. No confusing baker language. Just a clean jar, gluten-free flour, water, patience, and a little curiosity.
In this guide, I’ll walk you through the ingredients, daily feeding schedule, troubleshooting tips, storage, and real-life ways to use your starter. My motto at urdailyrecipes always leads the way: Simplicity first, creativity always.
Table of Contents
Key Takeaways: What You need To know
– A gluten free sourdough starter uses gluten-free flour, water, and wild yeast.
– You need about 7 days to build strong bubbles and a tangy aroma.
– Brown rice flour, sorghum flour, and buckwheat flour work well.
– Filtered water helps fermentation stay steady.
– A clean glass jar, spoon, and kitchen scale make the process easier.
– Sourdough fermentation does not remove gluten from wheat flour, so always use certified gluten-free ingredients if you need a gluten-free starter.
Why Make a gluten free sourdough starter at Home?
A gluten free sourdough starter helps you create naturally fermented bread, pancakes, crackers, and waffles without wheat flour. You mix gluten-free flour and water, then feed it daily until wild yeast and good bacteria create bubbles, lift, and gentle sour flavor.
What makes a gluten-free starter different from regular sourdough?
A gluten free sourdough starter relies on flours like brown rice flour, sorghum flour, buckwheat flour, or millet flour instead of wheat or rye. So, it needs a little extra attention because gluten-free grains ferment differently.
Regular sourdough uses gluten structure for stretch. However, gluten-free sourdough depends on fermentation, hydration, and binders in the final recipe. Because of that, your starter may look looser or thicker than wheat-based starter.
Also, always choose certified gluten-free flour if you cook for someone with celiac disease or gluten sensitivity. Cross-contact can happen fast in shared mills or home kitchens.
Why does this method work for beginner cooks?
A gluten free sourdough starter works well for beginners because you repeat the same simple rhythm every day. You stir, feed, smell, watch, and learn. Then, little by little, the jar teaches you.
Back in my Asheville kitchen, I loved that process. I’d feed my starter before coffee, then check the bubbles while the Blue Ridge air still felt cool through the window. It felt slow, practical, and surprisingly fun.
This method also keeps tools simple. You don’t need a bread machine, Dutch oven, or stand mixer to start. You only need a glass jar, spoon, rubber band, gluten-free flour, and filtered water.
Ingredients for a gluten free sourdough starter
A gluten free sourdough starter needs only gluten-free flour and water, but the right flour blend improves fermentation. Brown rice flour feeds wild yeast well, sorghum adds mild sweetness, and buckwheat brings minerals, earthy flavor, and strong activity.
Which flour works best for gluten-free sourdough?
A gluten free sourdough starter usually grows best with brown rice flour because it ferments reliably and smells mild. However, you can blend it with sorghum flour or buckwheat flour for better flavor and strength.
Here’s a simple ingredient guide:
| Ingredient | Why You Need It |
|---|---|
| Brown rice flour | Feeds wild yeast and creates steady bubbles. |
| Sorghum flour | Adds mild sweetness and soft fermented flavor. |
| Buckwheat flour | Boosts activity and adds earthy depth. |
| Filtered water | Supports fermentation without chlorine interference. |
For a first batch, I recommend 100% brown rice flour or a 50/50 mix of brown rice flour and sorghum flour. Then, once you understand the smell and texture, you can experiment.
What tools do you need before you begin?
A gluten free sourdough starter needs clean tools because healthy fermentation starts with a safe setup. Use a wide-mouth glass jar, a non-reactive spoon, a kitchen scale, and a loose lid or clean cloth.
You’ll need:
– 1 clean glass jar, at least 16 ounces
– 1 kitchen scale for accurate measurements
– 1 spoon or silicone spatula
– 1 rubber band to mark the starter level
– Certified gluten-free flour
– Filtered or spring water
– A warm kitchen spot, around 70°F to 78°F
Also, avoid metal containers. A quick stir with a metal spoon won’t ruin anything, but glass gives you a clear view of bubbles, rise, and texture.
How to Feed a gluten free sourdough starter Step by Step
Gluten Free Sourdough Starter
Equipment
- wide-mouth glass jar At least 16 ounces
- kitchen scale
- non-reactive spoon
- silicone spatula
- rubber band For tracking starter rise
- clean cloth or loose lid
Ingredients
- 30 g brown rice flour
- 30 g filtered water
- 30 g sorghum flour (optional for feedings)
- 30 g buckwheat flour (optional for feedings)
Instructions
- On day 1, combine 30 grams gluten-free flour and 30 grams filtered water in a clean glass jar. Stir until smooth and no dry flour remains.
- Scrape down the sides of the jar, cover loosely with a cloth or lid, and place the jar in a warm spot between 70°F and 78°F.
- Mark the starter level with a rubber band so you can monitor any rise or activity.
- On days 2 through 4, discard half of the starter each day and feed it with 30 grams gluten-free flour and 30 grams filtered water.
- Stir thoroughly after each feeding until the mixture resembles thick pancake batter.
- From days 5 to 7, continue feeding every 12 to 24 hours as bubbles increase and the aroma becomes pleasantly tangy.
- Watch for bubbles, visible rise, and a mildly sour smell. The starter is ready when it becomes active within 4 to 8 hours after feeding.
- For baking, feed the starter twice before use to strengthen activity and improve fermentation performance.
- Store the mature starter in the refrigerator with a loose lid and refresh weekly with fresh flour and water.
Notes
Nutrition
A gluten free sourdough starter grows stronger when you feed it with equal weights of flour and water. During the first week, you discard part of the mixture, add fresh flour and water, and watch for bubbles, rise, aroma, and consistency.
How do you start on day one?
A gluten free sourdough starter begins with a simple mix. Add 30 grams gluten-free flour and 30 grams filtered water to a clean jar. Stir until no dry flour remains.
The texture should look like thick pancake batter. Then, scrape down the sides, cover the jar loosely, and place it somewhere warm. Next, mark the level with a rubber band so you can track any rise.
Do not seal the jar tightly. Fermentation creates gas, and your starter needs airflow. Also, use a clean spoon every time. Small habits build better results.
How do you feed it during the first week?
A gluten free sourdough starter needs daily feedings after day one. Each day, discard some starter, then add fresh flour and water. This keeps acidity balanced and gives wild yeast new food.
| Day | What To Do |
|---|---|
| Day 1 | Mix 30g flour with 30g water. Cover loosely. |
| Days 2 to 4 | Discard half. Feed with 30g flour and 30g water. |
| Days 5 to 7 | Feed every 12 to 24 hours if bubbles increase and aroma turns pleasantly tangy. |
By day three, you may smell fruit, yogurt, or mild vinegar. However, don’t panic if activity slows on day four. Starters often pause before they strengthen.
How Do You Know a gluten free sourdough starter Is Ready?
A gluten free sourdough starter looks ready when it bubbles well, rises after feeding, smells pleasantly tangy, and shows activity within 4 to 8 hours. It should not smell rotten, show mold, or develop pink, orange, or fuzzy growth.
What should it smell and look like?
A gluten free sourdough starter should smell mildly sour, fruity, yeasty, or yogurt-like. It should show bubbles on the sides and top. Also, it may rise slightly or double, depending on the flour.
Look for these signs:
– Bubbles throughout the jar
– A tangy, clean aroma
– A thicker, airy texture
– Visible rise after feeding
– No mold or unusual color
If you see gray liquid on top, you may see “hooch.” Stir it in if it smells only sour, or pour it off if the smell feels sharp. Then feed the starter.
How can you test starter strength?
A gluten free sourdough starter passes the best test when it rises predictably after a feeding. The classic float test doesn’t always work with gluten-free starters because they lack gluten structure.
Instead, feed it, mark the level, and watch it for 4 to 8 hours. If it grows, bubbles, and smells balanced, you can bake with it.
For stronger bread, feed it twice before baking. First, feed in the morning. Then, feed again at night. Finally, use it the next morning when it looks bubbly and active.
Troubleshooting a gluten free sourdough starter
A gluten free sourdough starter may struggle because of cold temperatures, chlorinated water, weak flour, or missed feedings. You can fix most problems by warming the jar, switching flour, feeding consistently, and keeping hydration balanced.
Why isn’t my starter bubbling?
A gluten free sourdough starter often needs more warmth or better flour when it won’t bubble. First, move it to a warmer spot. Then, try buckwheat flour for one feeding because it often wakes up fermentation.
Common fixes include:
– Use filtered water if your tap water smells like chlorine.
– Keep the jar warm, ideally 70°F to 78°F.
– Feed by weight, not volume, for better balance.
– Switch flour if your rice flour seems stale.
– Stir well to add oxygen and refresh the culture.
– Discard regularly so acidity doesn’t overwhelm the yeast.
Also, trust your senses. If it smells rotten or grows mold, throw it out and start fresh. Safety matters more than saving flour.
What did my own kitchen test teach me?
A gluten free sourdough starter taught me patience during my third test batch. I used brown rice flour, filtered water, and a jar near my oven light. On day four, it looked quiet. Then, on day six, bubbles climbed the glass.
A reader from Charlotte, Megan R., shared this after trying the same method: “I never thought I could keep a starter alive. Lucy’s day-by-day notes helped me stop guessing. My first gluten-free pancakes tasted tangy, fluffy, and homemade.”
That kind of feedback matters to me because urdailyrecipes exists for real home cooks. I test recipes in a normal kitchen, with normal tools, for people who want dependable results without stress.
How to Store and Use a gluten free sourdough starter
A gluten free sourdough starter can stay on the counter if you bake often, or in the refrigerator if you bake weekly. Feed it before storage, cover it loosely, and refresh it at room temperature before using it in recipes.
How should you store it between bakes?
A gluten free sourdough starter can live in the fridge after it grows strong. Feed it, let it sit for 1 to 2 hours, then refrigerate it with a loose lid.
If you bake weekly, feed it once a week. If you bake rarely, refresh it every two weeks. Before baking, remove it from the fridge, discard half, and feed it. Then wait until it bubbles again.
For long breaks, you can dry a thin layer of starter on parchment paper. Once dry, break it into flakes and store it in a sealed jar. Later, rehydrate it with water and flour.
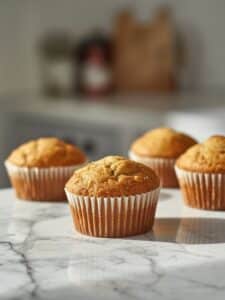
What can you make with it?
A gluten free sourdough starter adds flavor to more than bread. You can use discard and active starter in simple everyday recipes. That’s where creativity gets fun.
Try it in:
– Gluten-free sourdough pancakes
– Gluten-free waffles
– Savory crackers
– Flatbread
– Pizza crust
– Quick skillet bread
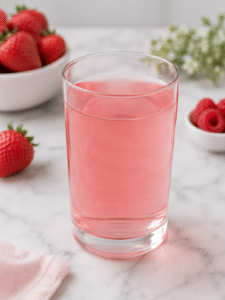
– Muffins with sourdough discard
For bread, use active starter at peak rise. For pancakes or crackers, discard works beautifully. Because gluten-free baking needs structure, many recipes also use psyllium husk, chia gel, eggs, or xanthan gum.
Once you build your first jar, you’ll understand why I love this process. It turns basic ingredients into something alive, useful, and deeply satisfying. Start small, stay consistent, and let your kitchen confidence grow one feeding at a time.