Disclaimer: This content is for educational purposes only, not medical advice. Always consult with a doctor before making significant changes to your diet, especially if you have pre-existing health conditions.
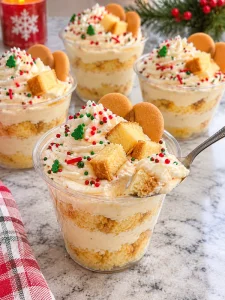
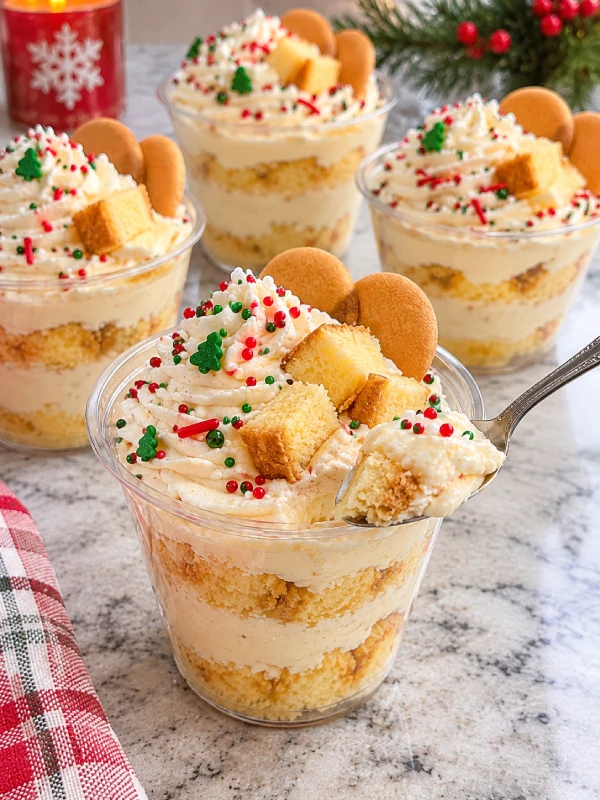
Christmas Cake Dip Cups are delicious individual holiday desserts made with fluffy vanilla cream cheese dip, soft pound cake cubes, warm Christmas spices, and festive sprinkles. These easy no-bake treats combine rich cheesecake-like cream, tender vanilla cake, and crunchy vanilla wafers in adorable dessert cups. They’re perfect for Christmas parties, holiday potlucks, family gatherings, and festive dessert tables.
The Story Behind These Christmas Cake Dip Cups
Hi, I’m Lucy White! One of my favorite things about Christmas is finding simple desserts that make holiday gatherings feel extra special.
There’s something comforting about the smell of vanilla, cinnamon, and nutmeg filling the kitchen during December.
When I started learning to cook in my twenties, I realized that memorable holiday desserts didn’t always need complicated recipes.
Sometimes, combining a few familiar ingredients creates something just as lovely as an elaborate Christmas cake.
That’s what makes these Christmas Cake Dip Cups so appealing.
Imagine fluffy vanilla cream cheese filling layered with tender pieces of buttery pound cake. Add a little cinnamon, nutmeg, and colorful Christmas sprinkles, and you have a festive dessert that’s easy to assemble.
Each spoonful offers the perfect combination of creamy filling and soft cake.
Best of all, you can prepare these individual desserts without turning on the oven when using fully baked store-bought cake.
Whether you’re hosting Christmas dinner or planning a cozy holiday movie night, these little cups bring sweetness and festive charm to your table.
Table of Contents
Key Takeaways: What You Need to Know
- Texture: Creamy, fluffy filling with tender cake cubes and crunchy cookies.
- Flavor: Sweet vanilla, cream cheese, cinnamon, and nutmeg.
- Difficulty: Easy and beginner-friendly.
- Prep time: 20 minutes.
- Cooking time: None when using prepared cake.
- Chilling time: 30 minutes.
- Total time: 50 minutes.
- Yield: 8 individual dessert cups.
- Best for: Christmas parties, potlucks, holiday dessert boards, and family gatherings.
1. Why You’ll Love These Easy Christmas Cake Dip Cups
Christmas Cake Dip Cups combine soft vanilla pound cake with a fluffy cream cheese filling and warming holiday spices. Served in individual clear cups, these desserts offer beautiful layers without complicated decorating. They’re especially convenient for Christmas entertaining because you can prepare the filling ahead of time and assemble the cups before serving.
What Makes Christmas Cake Dip Cups Special?
Unlike traditional layer cakes, these desserts don’t require frosting or slicing before serving.
Each cup contains a creamy vanilla filling layered with soft cake pieces.
The cream cheese provides a gentle tanginess, while Greek yogurt balances the sweetness.
Cinnamon and nutmeg add a warm holiday flavor that complements the buttery vanilla cake.
Mini vanilla wafers provide a delicious crunch just before serving.
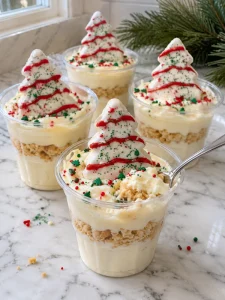
For another festive dessert featuring creamy vanilla flavors, try my Christmas Tree Cake Dip.
Are Christmas Cake Dip Cups Good for Holiday Parties?
Absolutely! Individual dessert portions make Christmas entertaining much easier.
Guests can enjoy their own dessert without waiting for someone to cut and serve a cake.
The clear cups also show off the attractive cream and cake layers.
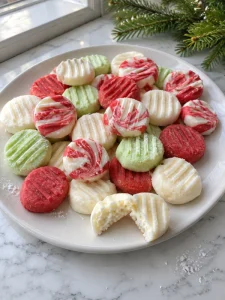
For a festive assortment, pair them with Christmas Sprinkle Sugar Cookies and Christmas Petit Fours.
2. Ingredients for Homemade Christmas Cake Dip Cups
The best Christmas Cake Dip Cups start with softened cream cheese, powdered sugar, Greek yogurt, whipped topping, and fully baked vanilla pound cake. Cinnamon and nutmeg provide gentle holiday spice, while colorful Christmas sprinkles and mini vanilla wafers add an attractive finishing touch.
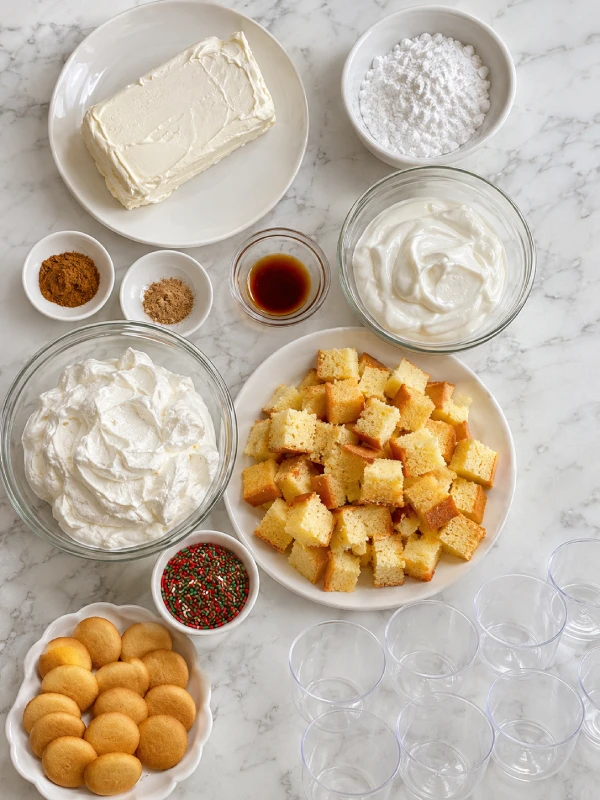
What Ingredients Do You Need?
| Ingredient | Amount | Purpose |
|---|---|---|
| Full-fat cream cheese, softened | 8 oz (226 g) | Creates a rich, creamy base |
| Powdered sugar | ½ cup (60 g) | Adds sweetness |
| Plain Greek yogurt | ½ cup (120 g) | Adds creaminess and tanginess |
| Vanilla extract | 1 tsp | Enhances vanilla flavor |
| Ground cinnamon | ¼ tsp | Adds warm holiday spice |
| Ground nutmeg | ⅛ tsp | Adds a cozy Christmas aroma |
| Whipped topping, thawed | 1 cup | Creates a light, fluffy filling |
| Fully baked vanilla pound cake | 8 oz (227 g) | Creates tender cake layers |
| Christmas sprinkles | 3 tbsp | Adds festive decoration |
| Mini vanilla wafers | 16 cookies | Adds a crunchy finish |
Equipment: Large mixing bowl, electric hand mixer, rubber spatula, sharp knife, cutting board, and eight clear 4–5-ounce dessert cups.
These quantities follow the Vintage Christmas Cake Dip Cups recipe from EatWellWell.
What’s the Best Cake for Christmas Cake Dip Cups?
Vanilla pound cake is ideal because its buttery flavor and relatively firm crumb hold up well between creamy layers.
You can use homemade or store-bought pound cake, provided it’s fully baked and cooled.
Other suitable options include vanilla sponge cake, yellow cake, or butter cake.
Avoid very crumbly cakes because they may lose their shape when mixed with the filling.
Can You Substitute Greek Yogurt?
Yes. Plain sour cream works as an alternative to Greek yogurt.
It creates a similarly tangy flavor and a slightly richer filling.
Choose a thick variety to avoid making the mixture runny.
For another individual dessert with delicious creamy layers, explore my Christmas Tree Cake Dirt Cups.
3. How to Make Christmas Cake Dip Cups Step by Step
Making Christmas Cake Dip Cups involves beating cream cheese with powdered sugar, Greek yogurt, vanilla, and warm spices. Fold in whipped topping, then layer the cream with small cubes of fully baked vanilla pound cake. Add Christmas sprinkles, refrigerate for 30 minutes, and finish with mini vanilla wafers before serving.
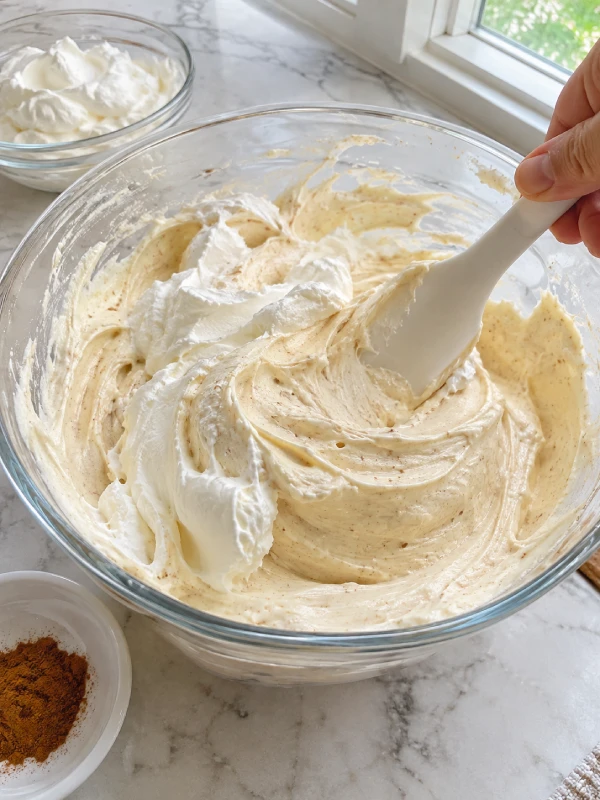
Easy Step-by-Step Instructions
Step 1: Prepare your ingredients.
Allow the cream cheese to soften until easy to mix.
Thaw the whipped topping in the refrigerator according to its package instructions.
Make sure the vanilla pound cake is completely cooled.
Step 2: Beat the cream cheese.
Place 8 ounces of softened cream cheese in a large mixing bowl.
Beat with an electric hand mixer for approximately one minute until smooth and creamy.
Step 3: Add powdered sugar.
Gradually add ½ cup powdered sugar.
Continue beating until the mixture becomes smooth and no visible lumps remain.
Step 4: Add yogurt and flavorings.
Add ½ cup plain Greek yogurt, 1 teaspoon vanilla extract, ¼ teaspoon ground cinnamon, and ⅛ teaspoon ground nutmeg.
Mix until evenly combined.
Step 5: Scrape the bowl.
Use a rubber spatula to scrape the sides and bottom of the mixing bowl.
This ensures the cream cheese and spices are fully incorporated.
Step 6: Fold in whipped topping.
Add 1 cup thawed whipped topping.
Gently fold it into the cream cheese mixture until smooth, airy, and fluffy.
Avoid vigorous mixing, which can deflate the topping.
Step 7: Prepare the pound cake.
Place the fully baked vanilla pound cake on a cutting board.
Using a sharp knife, cut the cake into approximately ½-inch cubes.
Step 8: Arrange the dessert cups.
Place eight clear 4–5-ounce dessert cups on your work surface.
Use a small tray underneath for easy transportation to the refrigerator.
Step 9: Add the first cream layer.
Spoon approximately 2 tablespoons of vanilla cream cheese dip into the bottom of each cup.
Smooth the mixture gently.
Step 10: Add the cake cubes.
Arrange a few small pound cake cubes over the cream cheese layer.
Distribute the cake evenly among the eight cups.
Step 11: Add another cream layer.
Spoon additional vanilla cream cheese filling over the cake cubes.
Use a piping bag if you want cleaner, more defined layers.
Step 12: Finish with cake and sprinkles.
Add a few remaining golden pound cake pieces to the top of each dessert.
Scatter the 3 tablespoons of Christmas sprinkles evenly across the eight cups.
Step 13: Refrigerate.
Cover the dessert cups and refrigerate for at least 30 minutes.
This helps the cream cheese filling firm slightly and allows the flavors to settle.
Step 14: Add vanilla wafers and serve.
Immediately before serving, place two mini vanilla wafers into each cup.
Serve chilled.

Christmas Cake Dip Cups
Ingredients
Equipment
Method
- Allow the cream cheese to soften until easy to mix. Thaw the whipped topping in the refrigerator according to its package instructions. Make sure the vanilla pound cake is fully baked and completely cooled before preparing the dessert cups.
- Place 8 ounces of softened full-fat cream cheese in a large mixing bowl. Beat with an electric hand mixer for approximately 1 minute until smooth and creamy.
- Gradually add ½ cup powdered sugar to the beaten cream cheese. Continue beating until the mixture becomes smooth and no visible lumps remain.
- Add ½ cup plain Greek yogurt, 1 teaspoon vanilla extract, ¼ teaspoon ground cinnamon, and ⅛ teaspoon ground nutmeg. Mix until all the ingredients are evenly combined.
- Use a rubber spatula to scrape the sides and bottom of the mixing bowl. This ensures that the cream cheese, powdered sugar, yogurt, and spices are fully incorporated.
- Add 1 cup thawed whipped topping to the cream cheese mixture. Gently fold it in with a rubber spatula until the filling becomes smooth, airy, and fluffy. Avoid vigorous mixing, which can deflate the whipped topping.
- Place the fully baked and cooled vanilla pound cake on a cutting board. Using a sharp knife, cut the cake into approximately ½-inch cubes.
- Place eight clear 4–5-ounce dessert cups on your work surface. Set the cups on a small tray to make transporting them to the refrigerator easier.
- Spoon approximately 2 tablespoons of the vanilla cream cheese dip into the bottom of each dessert cup. Smooth the mixture gently to create an even first layer.
- Arrange a few small vanilla pound cake cubes over the cream cheese layer in each dessert cup. Distribute the cake evenly among all eight cups.
- Spoon additional vanilla cream cheese filling over the pound cake cubes in each cup. Use a piping bag if desired to create cleaner, more defined dessert layers.
- Place a few remaining golden pound cake pieces on top of each dessert cup. Scatter the 3 tablespoons of Christmas sprinkles evenly across the eight cups for a festive finish.
- Cover the assembled dessert cups and refrigerate for at least 30 minutes. This allows the cream cheese filling to firm slightly and the vanilla and holiday spice flavors to settle.
- Immediately before serving, place two mini vanilla wafers into each dessert cup. Serve the finished Christmas Cake Dip Cups chilled to enjoy the fluffy filling, tender cake, and crunchy cookie topping.
Notes
How Do You Make Christmas Cake Dip Cups Extra Fluffy?
A light texture depends on a few simple techniques.
- Use softened cream cheese to prevent lumps.
- Add powdered sugar gradually for smooth mixing.
- Choose thick Greek yogurt to maintain structure.
- Fold whipped topping gently rather than beating aggressively.
- Chill before serving to help the filling hold its shape.
- Add vanilla wafers at the end to preserve their crunch.
For another delicious dessert featuring cream cheese and tender cake, try my Red Velvet Cheesecake Balls.
4. Expert Tips and Delicious Christmas Cake Dip Variations
Christmas Cake Dip Cups are easy to customize with different cake flavors, holiday spices, and decorations. You can experiment with chocolate cake, peppermint, gingerbread, or eggnog-inspired variations. The key is maintaining a fluffy filling and using fully baked cake that holds its shape between layers.
Why Are My Christmas Cake Dip Cups Too Runny?
Runny filling usually results from overly soft cream cheese, thin yogurt, or whipped topping that has become too warm.
For better results, choose full-fat block cream cheese and thick plain Greek yogurt.
Fold the whipped topping gently and refrigerate the filling if it seems too soft.
Avoid adding extra milk or other liquid ingredients.
Fun Christmas Cake Dip Cup Variations
- Gingerbread Christmas Cups: Add a pinch of ground ginger and a few crushed gingerbread cookie pieces.
- Chocolate Christmas Cups: Substitute chocolate pound cake for vanilla.
- Peppermint Cake Cups: Add a small amount of peppermint extract and crushed candy canes.
- Eggnog-Inspired Cups: Replace 2 tablespoons of Greek yogurt with prepared eggnog and increase the nutmeg slightly.
- Red Velvet Cups: Use fully baked red velvet cake cubes for a festive red-and-white dessert.
- Extra Crunchy Cups: Add crushed vanilla wafers between the cake and cream layers immediately before serving.
For another holiday dessert with warm gingerbread flavors, explore my Soft Chewy Gingerbread Men Cookies.
5. Serving, Storing, and Freezing Christmas Cake Dip Cups
Christmas Cake Dip Cups taste best chilled, when their creamy filling is fluffy and the pound cake remains tender. Their individual portions make them excellent for holiday dessert trays and parties. Because they contain cream cheese, Greek yogurt, and whipped topping, keep the finished cups refrigerated until serving.
How Should You Serve Christmas Cake Dip Cups?
Arrange the dessert cups on a white ceramic serving tray.
The contrast between ivory cream, golden cake, and colorful Christmas sprinkles creates a beautiful holiday presentation.
For an attractive dessert table, pair them with Round Christmas Royal Icing Cookies and Chocolate Thumbprint Cookies.
For another rich and creamy holiday dessert, serve them alongside Peppermint Oreo Cheesecake Bites.
Can You Make Christmas Cake Dip Cups Ahead of Time?
Absolutely! These desserts work well for holiday preparation.
| Storage Method | Recommendation |
|---|---|
| Cream cheese filling in refrigerator | Prepare up to 24 hours ahead |
| Assembled cups in refrigerator | Best within 2–3 days |
| Vanilla wafer decorations | Add immediately before serving |
| Freezing finished cups | Not recommended |
| Time outside refrigeration | No more than 2 hours |
Keep assembled dessert cups covered in the refrigerator at 40°F (4°C) or below.
For the freshest texture, assemble them a few hours before serving.
The pound cake gradually absorbs moisture from the cream filling, becoming softer during storage.
Avoid leaving dairy-based desserts at room temperature for extended periods.
The FDA recommends refrigerating perishable foods promptly and maintaining safe refrigerator temperatures. Review its food storage guidance for additional information.
6. Frequently Asked Questions
What Are Christmas Cake Dip Cups Made Of?
Christmas Cake Dip Cups contain cream cheese, powdered sugar, Greek yogurt, whipped topping, vanilla, cinnamon, nutmeg, fully baked pound cake, Christmas sprinkles, and mini vanilla wafers.
Are Christmas Cake Dip Cups No-Bake?
Yes. When you use fully baked store-bought pound cake, the dessert requires no additional baking. Simply prepare the cream filling, assemble the cups, and refrigerate.
Can I Make Christmas Cake Dip Cups the Night Before?
Absolutely! Prepare the cream cheese filling the night before and store it covered in the refrigerator. Assemble the cups closer to serving for more distinct layers.
What Can I Use Instead of Pound Cake?
You can substitute fully baked vanilla cake, yellow cake, butter cake, or sponge cake. Choose a cake that holds its shape when cut into cubes.
Why Is My Christmas Cake Dip Filling Lumpy?
Cold cream cheese may cause lumps. Allow it to soften slightly before mixing, then beat until smooth before adding the remaining ingredients.
Can I Freeze Christmas Cake Dip Cups?
Freezing isn’t recommended because the cream cheese filling may separate after thawing, and the cake pieces can become soggy.
7. Final Thoughts
These Christmas Cake Dip Cups combine everything I love about simple holiday desserts: fluffy vanilla cream, tender cake pieces, warm Christmas spices, and colorful decorations.
Their individual portions make them especially convenient for parties, family gatherings, and festive dessert tables.
With only 20 minutes of preparation and no additional baking required, they’re an easy way to create something delicious during the busy holiday season.
I hope these creamy little Christmas desserts bring sweetness and cheerful moments to your celebrations.
Happy holiday dessert making!