Disclaimer: This content is for educational purposes only, not medical advice. Always consult with a doctor before making significant changes to your diet, especially if you have pre-existing health conditions.
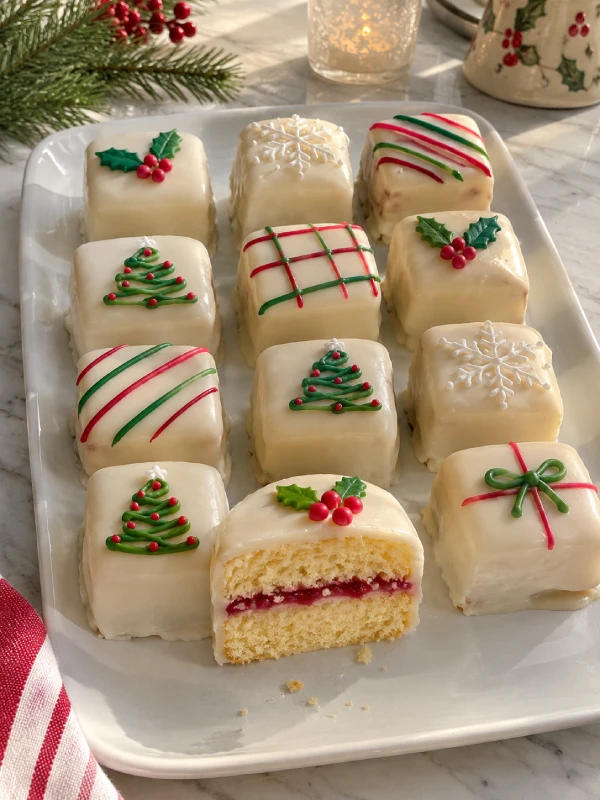
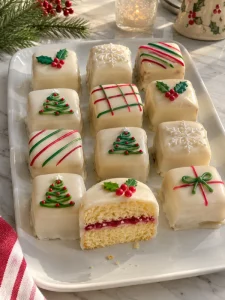
Christmas Petit Fours are beautiful, bite-sized holiday cakes made with soft vanilla cake, sweet raspberry jam, smooth poured fondant icing, and festive Christmas decorations. These elegant miniature desserts feature delicate cake layers covered in glossy white icing and decorated with cheerful red and green details. They’re perfect for Christmas parties, holiday dessert trays, edible gifts, and elegant winter celebrations.
Table of Contents
The Story Behind These Christmas Petit Fours
Hi, I’m Lucy White! One of my favorite things about Christmas baking is creating desserts that look as special as the holiday itself.
When I started cooking in my twenties, I was always fascinated by those tiny decorated cakes displayed in bakery windows.
They looked incredibly elegant, with delicate layers, smooth icing, and beautiful little decorations.
For a long time, I assumed desserts like these were too complicated for a home kitchen.
But Christmas Petit Fours are surprisingly approachable when you break the process into simple steps.
Imagine a soft vanilla cake layered with sweet raspberry jam, cut into miniature squares, and covered with silky white icing.
Now add tiny red and green Christmas decorations, and suddenly those simple cake squares become beautiful holiday treats.
Whether you’re planning Christmas afternoon tea, preparing homemade gifts, or arranging a festive dessert platter, these miniature cakes add an elegant touch to your celebration.
Key Takeaways: What You Need to Know
- Texture: Tender vanilla cake with a thin fruit filling and smooth icing.
- Flavor: Sweet vanilla, raspberry jam, and white chocolate.
- Difficulty: Intermediate but beginner-friendly with patience.
- Prep time: 45 minutes.
- Bake time: Approximately 25–35 minutes, depending on the cake mix.
- Cooling and chilling: Approximately 2 hours.
- Icing setting time: 45–60 minutes.
- Yield: Approximately 30–36 petit fours.
- Best for: Christmas dessert platters, afternoon tea, holiday parties, and edible gifts.
1. Why You’ll Love These Christmas Petit Fours
Christmas Petit Fours combine tender cake, sweet fruit filling, and delicate icing in beautiful individual portions. Their festive red, white, and green decorations make them especially attractive for Christmas entertaining. Although they look like bakery desserts, using a prepared cake mix and simple poured fondant icing makes them manageable at home.
What Makes Christmas Petit Fours Special?
Unlike ordinary sheet cakes, petit fours are small enough to enjoy in just a few bites.
Each miniature cake contains delicate layers that create a wonderful balance of flavors and textures.
The raspberry jam adds a bright fruity note, while the smooth icing provides a sweet finish.
Their compact size also makes them easy to serve on dessert trays.
You can decorate each cake differently using Christmas sprinkles, icing drizzle, or tiny sugar decorations.
If you enjoy festive holiday desserts with colorful decorations, try my Christmas Sprinkle Sugar Cookies.
Are Christmas Petit Fours Good for Holiday Parties?
Absolutely! These miniature cakes are perfect for Christmas celebrations because they’re attractive, easy to portion, and convenient to arrange on serving platters.
Their elegant appearance also makes them a lovely addition to holiday afternoon tea.
For a beautiful Christmas dessert assortment, pair them with Round Christmas Royal Icing Cookies and Chocolate Thumbprint Cookies.
2. Ingredients for Homemade Christmas Petit Fours
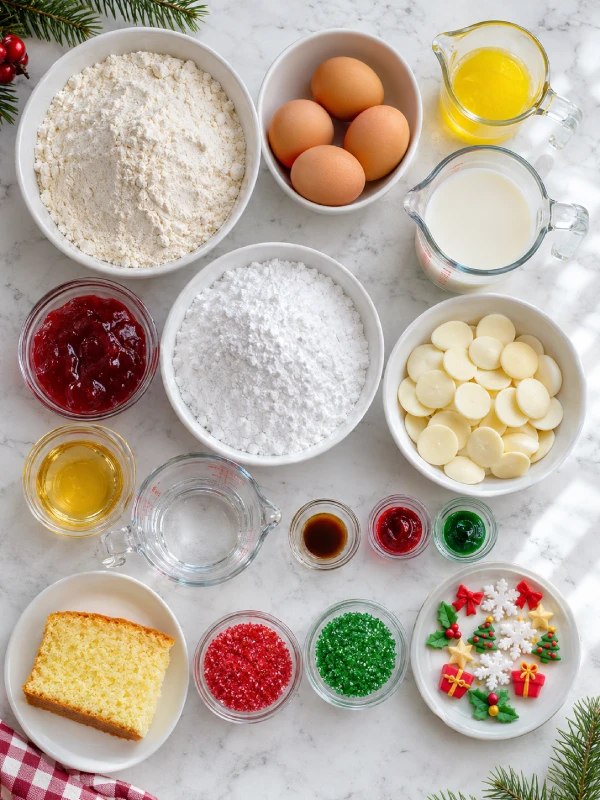
The best Christmas Petit Fours start with a firm, tender vanilla cake, a thin layer of raspberry jam, and a smooth white chocolate poured fondant icing. The cake provides structure, the jam adds fruity sweetness, and the icing creates an elegant finish.
What Ingredients Do You Need?
For the vanilla cake:
| Ingredient | Amount | Purpose |
|---|---|---|
| Vanilla or pound cake mix | 1 box, suitable for a 9×13-inch pan | Creates the cake base |
| Eggs | As directed on package | Provides structure |
| Butter or vegetable oil | As directed on package | Adds moisture |
| Water or milk | As directed on package | Hydrates the batter |
| Seedless raspberry jam | ⅓ cup (about 105 g) | Creates the fruity filling |
Choose a relatively firm vanilla cake or pound cake mix. Very delicate sponge cake may crumble during cutting and dipping.
For the poured fondant icing:
| Ingredient | Amount | Purpose |
|---|---|---|
| Powdered sugar, sifted | 4 cups (454 g) | Creates smooth icing |
| White chocolate melting wafers | 1 cup (about 140 g) | Adds richness and opacity |
| Light corn syrup | ¼ cup (about 78 g) | Helps create a smooth finish |
| Hot water | ¼ cup (60 ml), plus extra as needed | Adjusts consistency |
| Vanilla extract | 1 tsp | Enhances flavor |
For the Christmas decorations:
| Ingredient | Amount |
|---|---|
| Red gel food coloring | A few drops |
| Green gel food coloring | A few drops |
| Red and green Christmas sprinkles | 2 tbsp |
| Small Christmas sugar decorations | Optional |
Equipment: 9×13-inch baking pan, serrated knife, wire cooling rack, rimmed baking sheet, parchment paper, and small piping bags.
What Exactly Are Petit Fours?
The term petit four comes from French pastry tradition and refers to small confectionery or bite-sized desserts.
One popular style features miniature cakes layered with filling and covered in poured fondant icing.
Christmas Petit Fours use that classic concept with festive decorations and holiday-inspired flavors.
For another elegant miniature dessert, explore my Peppermint Oreo Cheesecake Bites.
3. How to Make Christmas Petit Fours Step by Step
Making Christmas Petit Fours involves baking a vanilla cake, layering it with raspberry jam, cutting it into small squares, and coating each piece with warm poured fondant icing. Chilling the cake before cutting and coating helps prevent crumbling and creates cleaner edges.
Easy Step-by-Step Instructions
Step 1: Prepare the baking pan.
Preheat the oven according to your cake mix instructions, typically 350°F (175°C).
Line a 9×13-inch baking pan with parchment paper and lightly grease the exposed sides.
Step 2: Prepare the vanilla cake batter.
Combine the cake mix with the eggs, butter or oil, and liquid specified on the package.
Mix according to the package directions until smooth.
Step 3: Bake the cake.
Pour the batter into the prepared pan.
Bake according to the package instructions, generally 25–35 minutes for a suitable sheet cake mix.
Check the center with a toothpick. It should come out clean or with a few moist crumbs.
Step 4: Cool completely.
Remove the cake from the oven and allow it to cool fully.
Refrigerate the cooled cake for approximately 30 minutes to make slicing easier.
Step 5: Create the cake layers.
Using a long serrated knife, carefully slice the cake horizontally into two even layers.
If the top is domed, trim it flat first.
Step 6: Add the raspberry filling.
Spread a thin, even layer of seedless raspberry jam over the bottom cake layer.
Carefully position the second cake layer on top.
Press gently to help the layers adhere without squeezing out the filling.
Step 7: Chill the layered cake.
Refrigerate for 30 minutes, then freeze for approximately 20–30 minutes until firm but still easy to cut.
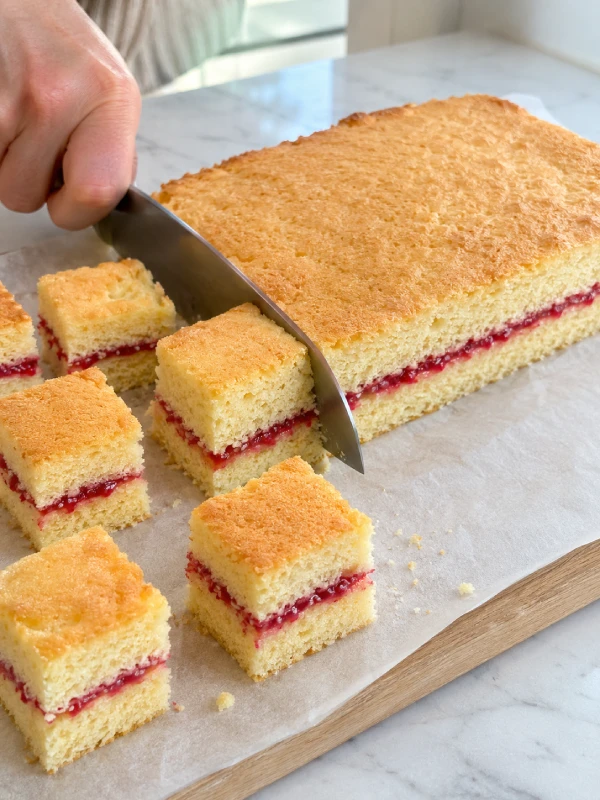
Step 8: Cut the petit fours.
Use a sharp knife to trim the outer edges.
Cut the cake into approximately 1½–1¾-inch squares, depending on the thickness of your cake.
Wipe the knife between cuts for cleaner edges.
You should get approximately 30–36 small cakes, depending on trimming and portion size.
Step 9: Prepare the poured fondant icing.
Melt the white chocolate wafers gently in the microwave or over a double boiler.
In a separate bowl, combine sifted powdered sugar, light corn syrup, hot water, and vanilla extract.
Stir until smooth, then add the melted white chocolate.
Mix gently to avoid incorporating too many air bubbles.
Step 10: Adjust the icing consistency.
The icing should be warm, fluid, and pour easily from a spoon.
Aim for approximately 100°F (38°C).
If it becomes too thick, stir in additional hot water one teaspoon at a time.
Step 11: Coat the petit fours.
Place the chilled cake squares on a wire rack over a parchment-lined rimmed baking sheet.
Spoon the warm icing over each cake, allowing it to flow over the top and sides.
Gently guide icing toward any uncovered corners.
Collect clean excess icing from the parchment, strain out crumbs, and rewarm as needed.
Step 12: Let the icing set.
Allow the coated petit fours to rest for approximately 45–60 minutes until the icing feels dry to the touch.
Carefully lift them from the rack using a small offset spatula.
Step 13: Add Christmas decorations.
Divide a small amount of remaining icing into two bowls.
Color one portion red and the other green.
Transfer to piping bags and create delicate Christmas trees, stripes, dots, or snowflake-inspired patterns.
Finish with a few festive sprinkles.
Step 14: Serve and enjoy.
Allow the decorations to firm before transferring the petit fours to a serving platter.

Christmas Petit Fours
Ingredients
Equipment
Method
- Preheat the oven according to your vanilla or pound cake mix instructions, typically 350°F (175°C). Line a 9×13-inch baking pan with parchment paper and lightly grease the exposed sides.
- In a large mixing bowl, combine the vanilla or pound cake mix with the eggs, butter or vegetable oil, and water or milk specified on the package. Mix according to the package directions until the cake batter becomes smooth.
- Pour the prepared batter into the lined baking pan. Bake according to the package instructions, generally 25–35 minutes for a suitable sheet cake mix. Check the center with a toothpick; it should come out clean or with a few moist crumbs.
- Remove the cake from the oven and allow it to cool completely. Once cooled, refrigerate the cake for approximately 30 minutes to make slicing easier and reduce crumbling.
- Using a long serrated knife, carefully slice the chilled vanilla cake horizontally into two even layers. If the top of the cake is domed, trim it flat before slicing.
- Spread a thin, even layer of seedless raspberry jam over the bottom cake layer. Carefully place the second cake layer on top. Press gently to help the layers adhere without squeezing out the raspberry filling.
- Refrigerate the layered cake for approximately 30 minutes, then transfer it to the freezer for approximately 20–30 minutes until firm but still easy to cut.
- Using a sharp knife, trim the outer edges of the chilled cake. Cut the layered cake into approximately 1½–1¾-inch squares, depending on the cake thickness. Wipe the knife between cuts for clean edges. The recipe should yield approximately 30–36 miniature cakes, depending on trimming and portion size.
- Gently melt the white chocolate melting wafers in the microwave or over a double boiler. In a separate mixing bowl, combine the sifted powdered sugar, light corn syrup, hot water, and vanilla extract. Stir until smooth, then add the melted white chocolate. Mix gently to avoid incorporating excessive air bubbles.
- Keep the fondant icing warm, fluid, and easy to pour from a spoon, aiming for approximately 100°F (38°C). If the icing becomes too thick, stir in additional hot water 1 teaspoon at a time until it reaches a smooth, pourable consistency.
- Place the chilled cake squares on a wire rack positioned over a parchment-lined rimmed baking sheet. Spoon the warm fondant icing over each square, allowing it to flow evenly over the top and sides. Gently guide icing toward uncovered corners. Collect clean excess icing from the parchment, strain out any crumbs, and rewarm as needed.
- Allow the coated petit fours to rest for approximately 45–60 minutes until the icing feels dry to the touch. Carefully lift the miniature cakes from the wire rack using a small offset spatula.
- Divide a small amount of the remaining fondant icing between two bowls. Color one portion with red gel food coloring and the other with green gel food coloring. Transfer the colored icing into small piping bags and create Christmas trees, stripes, dots, or snowflake-inspired patterns. Finish with red and green Christmas sprinkles or optional small sugar decorations.
- Allow the Christmas decorations to firm completely before carefully transferring the finished petit fours to a serving platter. Arrange the miniature cakes neatly and serve.
Notes
How Do You Get Smooth Icing on Christmas Petit Fours?
The secret is using properly chilled cake and icing with the right consistency.
- Freeze the cake squares briefly before coating.
- Sift powdered sugar to prevent lumps.
- Keep icing warm and pourable rather than thick and pasty.
- Avoid excessive stirring that creates air bubbles.
- Work in small batches so the cake squares remain firm.
For another festive dessert that looks beautiful on a Christmas platter, try my Red Velvet Cheesecake Balls.
4. Expert Tips and Delicious Christmas Petit Four Variations
Christmas Petit Fours can be customized with different cake flavors, fillings, and icing decorations. Vanilla, chocolate, peppermint, and almond flavors all work beautifully for holiday celebrations. Keeping the cake firm and the filling thin is essential for attractive results.
Why Are My Petit Fours Crumbling or Uneven?
Crumbly petit fours usually result from cake that’s too soft or hasn’t been chilled enough.
A very moist, delicate cake can also become difficult to cut into neat squares.
For better results, use a firm cake, chill it thoroughly, and cut with a sharp serrated knife.
If the icing appears uneven, check that it’s thin enough to flow smoothly down the sides.
Fun Christmas Petit Four Variations
- Chocolate Christmas Petit Fours: Use firm chocolate cake and white icing.
- Peppermint Petit Fours: Add a very small amount of peppermint extract to the icing.
- Almond Petit Fours: Replace half the vanilla extract in the icing with almond extract.
- Strawberry Petit Fours: Substitute seedless strawberry jam for raspberry.
- Red Velvet Petit Fours: Use red velvet cake for a beautiful red-and-white interior.
- Christmas Tree Petit Fours: Decorate each square with a small green icing tree and red sprinkle ornaments.
For a colorful holiday cake idea, explore my Grinch Christmas Cake.
5. Serving, Storing, and Freezing Christmas Petit Fours
Christmas Petit Fours are ideal for holiday dessert tables, afternoon tea, and homemade Christmas gifts. Their petite size makes them easy to arrange on elegant serving trays. Proper storage helps preserve the delicate cake layers and keeps the icing looking beautiful.
How Should You Serve Christmas Petit Fours?
Arrange the finished petit fours on a white ceramic platter or a tiered dessert stand.
Group the cakes by decoration to create an attractive display of red, white, and green Christmas colors.
You can also place each cake in a small paper candy cup for easier handling.
For a beautiful Christmas dessert table, serve them alongside Soft Chewy Gingerbread Men Cookies and Christmas Tree Cake Dip.
For another festive miniature dessert option, consider my Christmas Tree Cake Dirt Cups.
Can You Make Christmas Petit Fours Ahead of Time?
Absolutely! Preparing the cake and filling ahead of time makes decorating much easier.
| Storage Method | Recommended Time |
|---|---|
| Finished petit fours in an airtight container, refrigerated | Up to 3–4 days |
| Undecorated, wrapped cake layers in refrigerator | Up to 2 days |
| Unfilled cake layers in freezer | Up to 2 months for best quality |
| Finished petit fours in freezer | Not ideal for best icing appearance |
Keep finished petit fours refrigerated, particularly if using perishable fillings.
For food safety, the USDA recommends keeping refrigerated foods at 40°F (4°C) or below. Review its refrigerator temperature guidance.
Let refrigerated petit fours stand briefly before serving if you prefer a softer cake texture, but avoid leaving perishable desserts unrefrigerated for more than two hours.
6. Frequently Asked Questions
What Are Christmas Petit Fours Made Of?
Christmas Petit Fours are miniature layered cakes made with vanilla or pound cake, raspberry jam, poured fondant icing, white chocolate, and festive Christmas decorations.
Are Christmas Petit Fours Difficult to Make?
They require more patience than ordinary cookies, but the steps are manageable. Using a boxed cake mix simplifies the process considerably.
What’s the Difference Between Petit Fours and Regular Cake?
Petit fours are smaller, individually decorated cakes typically served in one or two bites. Regular cakes are usually larger and sliced into portions.
Can I Make Christmas Petit Fours Without Fondant?
Yes. You can coat them with white chocolate ganache or a simple powdered sugar glaze, although the finished appearance and texture will differ from classic poured fondant.
Why Is My Petit Four Icing Too Thick?
The icing may have cooled or contain too little liquid. Warm it gently and add hot water a teaspoon at a time until it pours smoothly.
Can I Make Christmas Petit Fours the Day Before?
Absolutely! Prepare and decorate them the day before, allow the icing to set, and store them carefully in an airtight container in the refrigerator.
7. Final Thoughts
These Christmas Petit Fours bring elegance and festive charm to any holiday dessert table.
With tender vanilla cake, a thin layer of raspberry jam, smooth white icing, and delicate Christmas decorations, they turn simple ingredients into beautiful miniature treats.
They’re especially lovely for Christmas parties, afternoon tea, edible gifts, and family celebrations.
I hope this recipe inspires you to create something a little extra special for the holiday season.
Happy baking!